Using WordPress is an easy way to publish your landing pages as a natural extension of your brand. All landing pages sent to WordPress are published as a subdirectory of your main website.
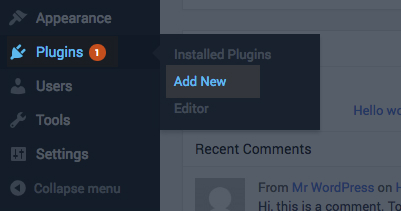
The first step is to install the plugin. Go to your WordPress admin, then click on Plugins and Add new.

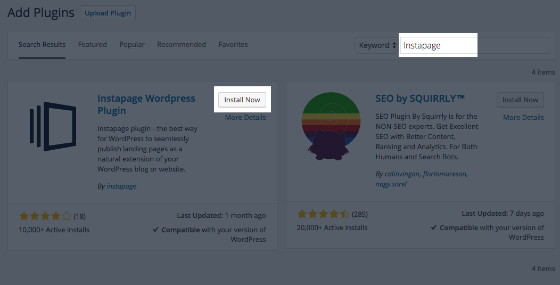
Then search for Instapage and click Install now.

Now it’s time to connect Instapage to the WordPress site. You have 2 options to achieve this:
1. Use a token
You’ll first have to get your token from the Instapage account and add it in the Settings tab of the plugin. Here’s how to do this:
Open the page you want to deploy, click Publish Page, and choose WordPress.
That will open the following page:
Now click on NOT THE WORDPRESS ADMIN? and copy the provided token.
NOTE: If you can't see the token here or you already have another WordPress account connected, you can get the token from the Integrations dashboard.
Next step is to go back to the Instapage plugin in WordPress, on the Settings tab and add your copied token.
In case you don’t have the necessary permission, you can send a pre-written instructional email to the WordPress administrator. Just click on SEND SETUP DIRECTIONS.
Here's a preview of the email:
2. Log in with username and password
Go to the Instapage plugin, the Settings tab, and enter your Instapage account’s username and password.


Then proceed to choose which workspaces you want to use with this WordPress website.
An extra step that will prevent an error down the line:
You could add the subdomain+domain on which you are publishing your pages. You have to add the exact subdomain you use for WordPress/Drupal publishing, not a different subdomain of the same domain. If you have your main website on www.domain.com and you are publishing on that, add "www.domain.com", not "pages.domain.com" or anything else.
To add the subdomain and domain, you can follow these steps linked here: https://d.pr/easwKu. Do not create a CNAME record as instructed at the end of the domain-adding process, as that will take your website down. The CNAME instructions only refer to custom domain publishing, and it is not a necessary step if you are adding the domain here for WordPress/Drupal publishing.
If you are prompted with the message from the image below, click on Request Access.
The domain owner will receive an email with your request as well as a notification in the Domain Access section of their account. If they approve it, you will then be able to publish your page on WordPress/Drupal normally after the approval.
If you know that you own this domain and you would like us to move it to your account, please follow this guide: https://d.pr/Cb6NKe.
Now you are ready to publish a landing page. To achieve this, go back to the slideout, click on the Publish Page button, and select WordPress.
A message such as the one below should appear, and you can click on Push to WordPress.
After our platform sends the page to the site, you have the option to publish the page. If you’re the WordPress site’s admin, make your way back to the plugin and click on the Add Page tab. There you can choose the URL and what type of page you want to publish (Landing page, Home page, 404 page). Click Publish once you’re happy with the settings.
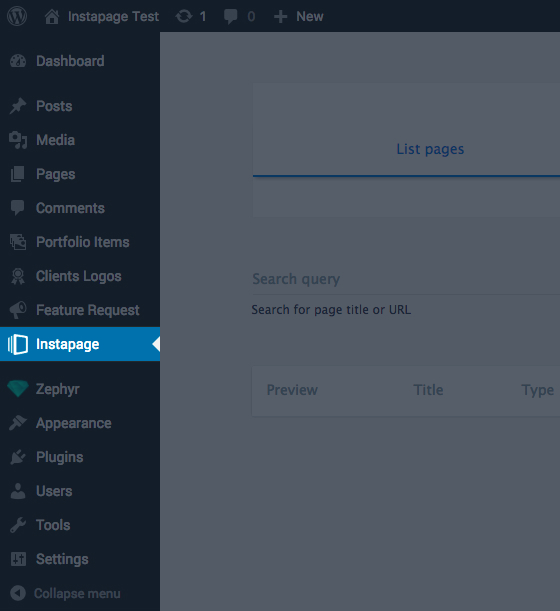
Congrats, now the page is live! Furthermore, it’s also accessible from the List pages tab of the plugin.
Make sure you disable any cache plugins you might have installed on your WordPress website.
In case you’re experiencing issues with publishing through WordPress, make sure that you do not have any plugins that might conflict with our landing page plugin. Since there are so many different plugins for WordPress in general, we do not have a fixed list of the ones that cause problems.
! EasyWP hosting from Namecheap implements an advanced caching mechanism (Varnish, Opcache, Redis object cache) to speed up client sites, which interferes with the publishing of pages. This causes the issue where you can have only one published page in WP. If you try to publish another one, the first gets automatically unpublished.
If disabling your cache plugin is not an option, then check our Custom Domain publishing option, as seen here: https://d.pr/nTmXTW and this will allow you to use your domain name while bypassing your WordPress website. Note that publishing via Wordpress does not count towards the subdomain limit of your subscription, but publishing via CNAME does. To view your subdomain limit, go to My Account Admin > Subscription.
1. If the domain that you are trying to publish the page on is currently owned by a different Instapage account, please note that you will need to add the desired subdomain in the domains dashboard of Instapage account as well in order to be able to use it with Wordpress. To access the domains dashboard, click on the name of the workspace in the upper-left corner, then select Workspace settings, and finally, Domains as seen here: https://d.pr/MbG5aF.
2. If you encounter any issues with publishing, use our troubleshooting guide found here: https://d.pr/3KVlcw.
In case you want to connect multiple WordPress accounts to a single Instapage workspace to be able to publish landing pages to multiple WordPress accounts, just install our plugin on all of those WordPress accounts and use the same CMS token of the workspace for all of them.
After the desired WordPress accounts are connected to your Instapage workspace, you can push the landing page to WordPress. Note that by pushing the landing page to WordPress, the page will be available for publishing from inside all of those connected WordPress accounts. So, in case privacy between those WordPress accounts is a concern, you should use different workspaces for each WordPress account. After the page has been pushed to WordPress, log into the WordPress account from which you want to publish the page and set the URL from there.